Sunday, October 31, 2010

Camouflage

My sewing space was recently featured over at The Blue Gardenia Blog. It was all cleaned up when I took those pictures. Now it looks like a tornado came through. Fall fabrics and patterns lying in piles all over the place.

I wanted an easy project after the Karl Lagerfeld jacket so I picked a pile with an autumn print knit and McCall’s pattern 6163.

The dress is described as close fitting, above mid knee length, with mock wrap front gathered at left side, collar, collar band, raglan sleeve, side zipper and stitched hem.
The poly knit fabric is from JoAnne Fabric and is a print type that I have heard called “a shadow print” because it looks like the shadows of a leafy branch. When I modeled the finished dress, my husband‘s first comment was “That looks like camouflage”. Not exactly the comment I was expecting, but it got me thinking about using prints to camouflage things. This darkish random print tends to hide body bumps which is good, but it also hides style details. If I didn't know it was there, I would never noticed the collar. It turns out the print's camouflage like properties were fortuitous for another reason. I had a sewing disaster making the dress. I laid it down on the table to trim the side seams, but it wasn’t laying flat and I inadvertently sliced into the back hip area.
I didn’t have enough fabric to cut another back piece. To salvage the dress, I cut a large patch from the same part of the print and hand appliquéd it over the cut, matching the print and turning under about ¼ inch seam allowance.
I turned the dress to the wrong side and trimmed away the fabric around the cut to match the edge of the seam allowances of the patch.
Then I turned the seam allowance out so I could see where my hand stitching just caught the edge of the fabric and machine stitched exactly on that line of stitches. I removed the hand stitches and pressed. Basically I inserted a circular section of fabric into the original garment matching the print, making it almost invisible. The technique was described in a Threads magazine article on insetting decorative shapes into a garment. I used the technique to patch my dress and the print helps camouflage the patch. This is a closeup picture, but to the naked eye it is almost invisible.
Wheh! I am glad I was able to pull the repair job off because I really like how the dress turned out.


Sunday, October 24, 2010

Burda Style - Karl Lagerfeld Jacket


The jacket pictured on the front cover of the Oct Burda Style magazine is from Karl Lagerfeld's Spring 2010 collection. I didn't really care for it at first glance. The jacket looked bulky and stiff. It stuck out in odd places, and was not attractive on the model. But some of the styling details were unique and interesting. The extended front that is folded up and sewn to the side seam and arm hole, and the sleeve top that overlaps the jacket shoulder and are held in place with a button and in-seam buttonholes.

I kept studying the line drawing and the picture of the jacket Style.com
In those the jacket hung straight from the shoulders and skimmed the hips. It reminded me in some ways of the boxy jackets of the 60’s which often had high lapels and ¾ length sleeves. It looked like it could be wearable so I decided to make it.

The suggested fabric was ottoman. Ottoman describes a weave that has horizontal ridges. The ridges can make the fabric stiff. I did not see that the ottoman weave added anything to the jacket. So I chose a medium weight green wool flannel with a plush finish. When choosing a fabric for this jacket, it is helpful to know that there will be four layers of fabric in the side seams, the back, front and the two layers of the extended front. And in the side hem area, two more layers. A lot of fabric.

The welt pockets on the turn back piece are about an inch deep, not big enough to hold anything worthwhile. I made the welts, but they are decorative. They are sewn shut and there is no pocket bag behind them. There were no recommendations for interfacing the back. I felt it needed more structure in the shoulder areas to balance the heavier front. I added interfacing to the upper back and extended it around the arm holes. I also used wigan on the back and sleeve hems to maintain shape. I had to make my own wigan for the back hem as it is 6 inches deep. I used purchased buttons rather than covering buttons to match the jacket as Burda did. The fitting changes that I made for my body differences; I added a back shoulder dart and eased it in to the front shoulder seam. And I added an inch or so in the hip area so that the jacket hung straight down over my hips. The instructions specifically tell you not to press the hem of the jacket. I was not sure if that was just for that step of construction or in the final garment. In the Style.com photo, the bottom edge of the jacket was very crisp. I pressed the bottom of the turn back, and in addition tacked it to the front about 2 inches from the armhole and at the welt pocket. The sleeves are really cool. Here is what they look like before they are sewn into the armhole. I tried to poke my fingers through the inseam button holes so you could see where they are located on either side of the pointed top.

This is what they look like after being sewn into the armhole and folded up over the button on the shoulder.


The jacket fits fine, but it is a bit big and boxy. The shoulders are wide. I think I may need go with bigger raglan shoulder pads as the sleeves are collapsing a bit at the shoulder. It is more like a short coat than a jacket one would wear all day in the office. The skirt shown with the jacket in the magazine doesn’t fit my lifestyle. I am a little puzzled as to what to wear with this jacket. I am wearing it with a long skirt in these pictures, but I think a knee length tapered pencil shirt, or tapered pants would look better.

This pattern, and instructions, are available as a download from Burda Style.

When I went out on Style.com to get a picture of the jacket, I was surprised to see that Karl used turned back sections in numerous garments in his Spring and Fall 2010 ready to wear collections. These are two of my favorites.
Now that I have made the Burda jacket, I feel I might be able to make pattens for a similar jacket and dress on my own. The invitations to the holiday parties are starting to come in. And one specified "Dress to the nines!" Wouldn’t the black dress with the lace be fun to wear?

Monday, October 11, 2010

Accessories II

My last two accessories for the contest were purses. The first was a drawstring purse for the beach look. This was my rough design drawing.I thought bright stripes were appropriate for a beach tote. I had orange and tan denim in my stash, both of which were a nice contrast to the blue and brown of my outfit. I have always liked the look of leather trim on a linen purse so I decided to make the top and bottom of the bag out of brown leather. The leather would add contrast, but also strength in the top drawstring area and bottom. At the same time I was mentally planning this bag I was looking through my “sewing with leather” books and saw a version of this made entirely of leather. I wondered if there was any way I could make this beach bag so that it could be converted to all leather. Only the striped panel needed to be covered for it to be all leather.

Convertible garments fascinate me and I have lots of pictures in my idea file. My sons’ favorite pants for years were cargo pants that could be converted into shorts by zipping off the bottom of the pants leg just below the knee. And I like this Cynthia Rowley coat that can be converted from a knee length to waist length coat or from the coat into a vest in two different lengths. Zipper were key to the convertibility of both these garments. So I thought, what if I put one side of a zipper between the leather and the denim stripes and sewed the other side of the zipper to a leather panel that could be zipped on over the denim stripes. And if the zipper had metal teeth, it would be a nice accent on the bag, sort of like piping. And why stop with the leather zip on panel, I could make panels out of other materials like fur, tapestry or painted canvas to change the look of the bag. The most difficult part of this project was finding the zippers. I ended up purchasing the 31” open ended (separating) brass teeth zippers from Zipper Source They make zippers to your specifications. My zippers cost about $13.00 each. The other convertible part of this bag is the strap, It is made of two pieces of leather with another zipper iinserted between them. Unzip the zipper and the one strap turns into two, which can be worn over both shoulders like a backpack. I got this idea from the bag my husband uses to haul his towel, ipod, reading material and gazillion SPF sunscreen to the beach. Here are all the parts of the striped version before final assembly The brown lambskins leather used on this bag came from www.Fabricmartfabrics. They have very nice leather and you can get some great deals when they have sales. here is the finished striped version. A closeup of the purse with the leather panel zipped on
And the third version. The day before the contest deadline, I was at Hancock Fabrics buying the grommets and I stopped to look through the upholstery remnant pile. There was a 5/8 yard piece of brown and tan zebra jacquard that was perfect for another panel. In fact, my favorite version of the bag is with this panel.
A friend suggested I put together instructions for making this bag and I have started doing that. She has promised to be my pattern tester.


The second purse is also convertible. It can be worn 2 ways, hanging from a belt or across the shoulder on a chain accented strap.

My inspirations were these pictures torn from magazines. One a picture of a belt with a small purse hanging by straps, and the other a picture of small purses on chains worn around the neck.

The bag is made with a purse frame from which I bought at Hancock’s. There were no instructions in the package on how to use the frame. There was a sticker on the packaging that said "Visit our web site for project instructions". The web site had projects for other stuff the company makes, but not purse frames. Fortunately, an Internet search yielded an excellent purse frame tutorial at u-handbag Purse Frame Tutorial For this purse I used orange distressed leather from Etsy dealer SantosLeathers.
I could not find a chain of the right metal color, weight and size to use for the strap. I had an old chain necklace that was exactly what I wanted, but it was not long enough for the whole length of the strap. So I cut the necklace in half and used the chain on the end of the straps where they attach to the frame. The swivel hooks used to attach the strap to the purse frame were salvaged from a thrift store purse. I added a round leather medallion made out of contrasting brown leather to the front of the purse. I cut it out using the wavy blade of my rotary cutter and attached it to the bag with decorative stitching. I added a large brass bee as a decorative accent. The bee has personal signifigance to me. I have enough leather to make a matching belt and I plan to do that in the near future, but for now I can wear the purse on belts I already own.
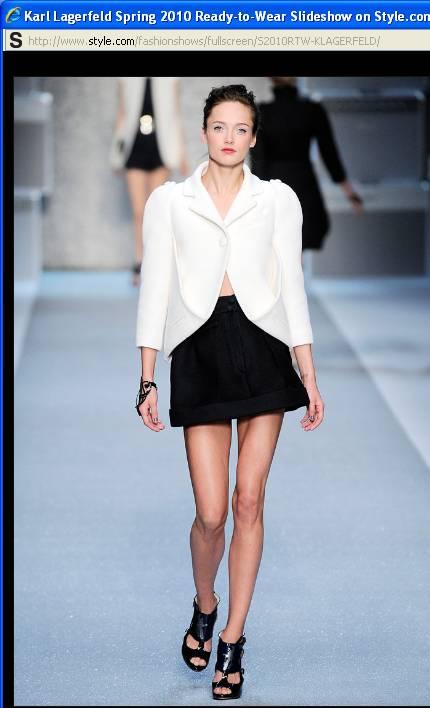
These purses are so cute and I see them everywhere. Including on the cover of the Oct 2010 Burda magazine. One is shown with the Karl Lagerfield jacket which I am working on now.

Sunday, October 3, 2010

Accessories - Part 1

A couple of weeks ago while I was browsing the message boards at Patternreview.com, I came across the Accessories contest. Make five accessories and use them to accessorize 4 looks using the same garment(s). I have a idea file full of magazine pictures of accessories I like or that were made using a neat technique or color combination. I consider myself a woefully inadequate accessorizor. On a good morning I will remember to put on earrings, but scarves, necklaces, etc. collect dust in my closet. As I read the rules of the contest I felt myself getting so excited and ideas were just popping up in my head. Here was the motivation to make some accessories and use them. I ignored the fact the month long contest had started two week before.

I decided to use all the accessories on an outfit of brown pants and blue blouse. I don’t know where that combo came from, it was in the mental images that appeared in my head. The blouse was a medium blue, stand collar, long cuffed sleeves, front opening with long shirt tails. It was a style that could be worn tucked in, as an over blouse or tied around my waist. Of course I did not have this perfect blouse in my wardrobe. I found some possible candidates in the stores, but not in the right color blue. So before I started the accessories I made the blouse using Burda Style's 8-2009 blouse pattern 131.
The only difference was I made the straight bottom into a shirt tail shape copied from one of my husband's shirts.


I picked four “events” for styling - All in the fall - Saturday Errands, Day at the Beach, Work Day and Art Opening. I drew a figure with the brown pants and blue blouse plus accessories from my idea file, with notes on pattern location, materials, etc. Here are examples of my crude drawings. I had lots of fun doing this.


The first accessory I made was a hat. The pattern is from the Autumn 2007 issue of Female magazine, a Japanese pattern magazine for teens. I got the magazine several years ago to see what it was like. The crown of the hat is a flat envelope shape pieced from multiple wool fabrics. It is sewn to a small brim. A button and loop at the top corners of the envelope piece allows you to fasten them together and the crown sort of droops, forming soft folds in the fabric. The lining is a typical cylindrical shape that fits the head closely. The fabrics came from two thrift store skirts and scraps from a jacket sewing project.
One of the thrift store skirts was an Abercrombie and Fitch mini skirt. A&F is luxury retailer targeted 18-21 year olds. The skirt was exactly 12 inches long from waist to hem. It was not a good bargain from the standpoint of useable fabric. The zipper was 4 “from top to stop for gosh sakes. Isn’t that the size used for doll clothes? But the fabric was a brown and bright blue herringbone which was exactly the colors needed to coordinate with my outfit. And I was able to reuse other bit and pieces of the skirt; the blue silk lining to line the hat. And the ribbon belt for the inside hat band.
Next I decided to tackle the sandals for my beach look. The flat leather soled sandals have colorful fabric straps that can be wrapped around your feet and ankles. The instructions are in the April 2010 issue of Burda Style. When I think of homemade sandals and shoes, I remember the ugly, crude styles that "back to nature hippie types" made and wore in the 70's. But after I noticed the instructions in Burda Style I came across this Brazilian web site Pape which sells similar soles and a variety of different straps made of fabric, leather and beads, so you can create your own customized sandals. The videos on their site show different ways to wrap/tie the straps. The pattern for the soles of these sandals is created by tracing a pair of your own flat shoes. I traced a pair of flip flops. The soles are cut from thick rigid leather, 2 pieces for each foot. I used a heavy duty utility knife with a new blade for this and it went quickly. Slits/holes are cut in the top piece of the pairs of soles to allow loops to be inserted. The two layers of leather are glued together and then hand sewn around the edge. The leather I used was left over from some long ago Boy Scout project. I did not have a leather punch to make the holes around the edge of the soles. Instead I used a Dremmel tool and one of the tiny size drill bits this tool can use. This was suggested by the clerk at the Tandy Leather store who said I would kill my wrist punching holes in the leather with a hole punch. Hand sewing the two layers of the soles together is done with waxed nylon thread and harness needles. It took me a while to do it and was not fun. Pictures of the assembly process (and my skinned knuckles) are in this Flikr set. Accessories-Sandals While I probably won't make another pair, I did learn some techniques that can be used to repair shoes and purses. And I have some ideas for other top pieces that can be used with these soles.

Then it was on to something easy. A visor with attached head scarf. When I doing outdoor stuff like hiking or sailing, I like to wear a head scarf versus a hat for several reasons. It is harder for the wind to whip a scarf off my head and make a Medusa mess of my hair. And it covers more of my hair. which tends to lighten to a reddish color from sun exposure. A plain head scarf can have a babushka/grandma look, but a scarf with a brim in a modern print doesn't. I got my first brimmed headscarf many years ago on a sailing trip around Granada. It is a square of tropical print fabric sewn to a piece of plastic shaped like a brim. I bought it from a boatboy that had motored out to the sailboat in hopes of selling us cigarettes, fruit, beverages, souvenirs, frsh fish and lobsters This boatboy was a good looking Frenchman and he had a hilarious marketing pitch on the versatility of this head scarf. The brim could be used to funnel stuff into the mouth, or out away from the boat in the case of sea sickness or too many rum punches. It could be used as a blindfold for fun games, a face covering in Muslim countries, You get the gist of his spiel. Even though the print was garish, I bought it and have used it often over the years. The new version is made from a pattern in the April issue of Lady Boutique. The brim is sew to a band with velcro sewn to the back for adjustments. A triagular scarf is sewn to the brim. It works great. I used the same tie dye print fabric for the new visor scarf as the straps for the sandals.